Build Secure Multi-Tenant Login Systems with Next.js & Supabase
Learn how to create robust authentication systems for multi-tenant SaaS applications using Next.js and Supabase. This guide covers tenant isolation, role-based access, and security best practices to ensure seamless user experiences across organizations.

Zakariae

Building a secure authentication system for multi-tenant applications represents one of the most challenging aspects of modern SaaS development. When you combine the power of Next.js with Supabase's authentication capabilities, you unlock a robust foundation for creating login systems that can handle complex tenant isolation, role-based access control, and seamless user experiences across multiple organizations. This comprehensive guide walks you through everything you need to know about implementing nextjs supabase auth in production-ready multi-tenant environments.
Whether you're building a no-code platform where clients create their own applications, a white-label solution for agencies, or an enterprise SaaS product serving thousands of organizations, understanding how to architect authentication properly will save you countless hours of debugging and security headaches down the road. The strategies outlined here have been battle-tested in production environments serving millions of users across diverse tenant structures.
Key Takeaways
- Multi-tenant authentication requires careful consideration of session handling across Server and Client Components in Next.js App Router applications.
- Row Level Security (RLS) in Supabase provides database-level tenant isolation that complements application-layer authentication checks.
- Defense in depth means implementing authentication checks at multiple layers: middleware, data access, server components, and server actions.
- Custom subdomain authentication requires special handling for cookies, session management, and tenant resolution.
- Token refresh strategies must account for both server-side rendering and client-side navigation patterns.
- Production deployment demands proper SSL configuration, secure cookie settings, and comprehensive error handling.
Understanding Multi-Tenant Authentication Architecture
Multi-tenant authentication differs fundamentally from single-tenant systems because every authentication decision must account for tenant context. In a traditional application, you simply verify that a user is who they claim to be. In a multi-tenant system, you must also verify which organization they belong to, what permissions they have within that organization, and whether they're accessing resources they're authorized to see.
The architectural foundation for multi-tenant auth typically follows one of three patterns. The first approach uses shared database with row-level isolation, where all tenants share the same database tables but access is controlled through policies that filter data based on tenant identifiers. This approach works exceptionally well with Supabase's Row Level Security features. The second pattern employs schema-per-tenant isolation, creating separate database schemas for each organization. The third uses database-per-tenant isolation, providing complete separation at the infrastructure level.
For most SaaS applications, the shared database approach with RLS offers the best balance of security, maintainability, and cost efficiency. Supabase excels at this pattern because RLS policies execute at the database level, meaning even if application code contains bugs, unauthorized data access remains impossible. This defense-in-depth approach aligns perfectly with modern security best practices.
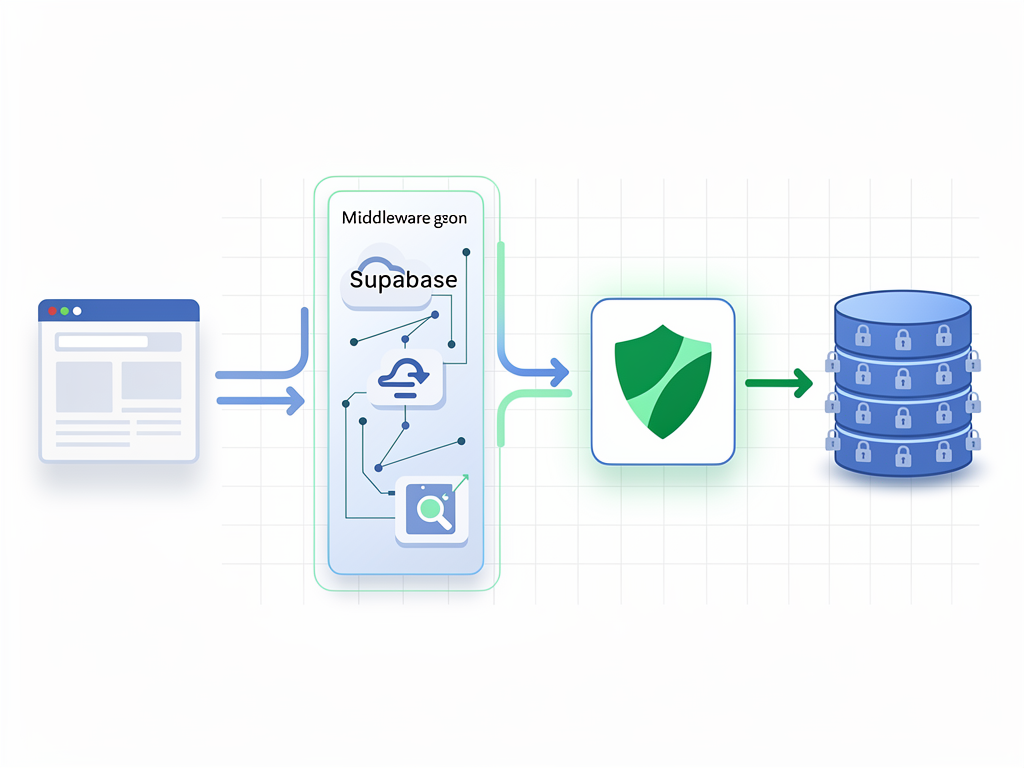
When building with Next.js App Router, your authentication system must handle sessions across multiple execution contexts. Server Components render on the server and need access to authentication state. Client Components run in the browser and require different session handling. Server Actions and Route Handlers act as API endpoints that must independently verify authentication on every request. Middleware intercepts requests before rendering and can perform optimistic checks, though it should never serve as your only security boundary.
Setting Up Supabase Authentication for Multi-Tenant Applications
Configuring Supabase for multi-tenant authentication begins with proper project setup and understanding how Supabase Auth integrates with your Next.js application. Start by creating a new Supabase project and noting your project URL and anon key, which you'll need for client-side authentication, as well as your service role key for server-side operations that bypass RLS.
Your environment configuration should include these essential variables stored securely in your deployment platform:
Security Note: Never expose your service role key to the client. This key bypasses Row Level Security and should only be used in server-side code for administrative operations.
The Supabase client configuration differs between browser and server contexts. For browser-side authentication, create a client that uses cookies for session storage. This ensures sessions persist across page navigations and survive browser refreshes. The server-side client needs access to cookies from the incoming request to read the current session, and it must be able to set cookies in the response to handle token refresh.
Implementing the authentication client requires creating separate utility functions for different contexts. Your browser client handles user-facing authentication flows like sign-in, sign-up, and password reset. Your server client reads sessions during server-side rendering and API route handling. A middleware client specifically handles the token refresh flow that keeps sessions alive during navigation.
For multi-tenant applications, you'll extend the default Supabase user metadata to include tenant information. When users sign up or are invited to an organization, store the tenant identifier in their user metadata or in a separate memberships table that tracks which users belong to which organizations. This tenant context becomes crucial for all subsequent authorization decisions.
Implementing Row Level Security for Tenant Isolation
Row Level Security transforms your PostgreSQL database into a fortress where data isolation is enforced at the lowest possible level. Even if your application code contains vulnerabilities, RLS policies prevent users from accessing data belonging to other tenants. This architectural decision provides peace of mind that few other security measures can match.
Creating effective RLS policies starts with establishing a consistent pattern for tenant identification across all your tables. Every table that contains tenant-specific data should include a tenant_id or organization_id column. This column becomes the foundation for all your security policies. Foreign key relationships ensure referential integrity, while RLS policies ensure access control.
A basic RLS policy for tenant isolation looks straightforward but requires careful consideration of edge cases. Your SELECT policy should verify that the current user's tenant matches the row's tenant. Your INSERT policy should ensure users can only create records for their own tenant. UPDATE and DELETE policies follow similar patterns but may include additional role-based restrictions.
The authentication context in Supabase RLS policies comes from the JWT token that Supabase Auth issues. You can access custom claims stored in this token using the auth.jwt() function within your policies. For multi-tenant applications, include the user's current tenant identifier in their JWT claims, allowing RLS policies to efficiently filter data without additional database lookups.
Consider implementing a helper function in your database that extracts tenant information from the current session. This function can be reused across multiple policies, ensuring consistency and simplifying maintenance. When tenant assignment logic changes, you update one function rather than dozens of policies.
Testing RLS policies requires methodical verification. Create test users belonging to different tenants and verify they can only access their own data. Attempt cross-tenant access through various vectors: direct queries, joins, subqueries, and function calls. Automated tests that verify tenant isolation should run as part of your continuous integration pipeline.
Building the Authentication Flow in Next.js App Router
The Next.js App Router introduces patterns that differ significantly from the Pages Router, and authentication must adapt accordingly. Server Components render on the server by default, meaning they can directly access server-side authentication utilities. Client Components require hooks and context providers to access authentication state. Understanding when to use each approach determines the security and performance characteristics of your application.
Your authentication flow begins when users land on your application. Middleware intercepts the request and checks for a valid session cookie. If the session exists but the access token has expired, middleware refreshes the token and updates the cookie. If no valid session exists and the user is accessing a protected route, middleware redirects to the login page.
The login page itself should be a Client Component because it needs to handle user interactions and form submissions. Use Supabase's signInWithPassword method for email/password authentication or signInWithOAuth for social providers. After successful authentication, redirect users to their intended destination or a default dashboard.
For multi-tenant applications, the post-authentication flow must resolve the user's tenant context. If users belong to multiple organizations, present a tenant selector. If they belong to only one organization, automatically set that context. Store the selected tenant in the session or a separate cookie so subsequent requests know which tenant's data to access.
Server Components that display protected content should verify authentication before rendering. Create a reusable authentication check function that throws an error or redirects if the user isn't authenticated. Wrap this check in React's cache() function to prevent redundant authentication checks during a single request.
Server Actions require independent authentication verification on every invocation. Never assume that because a form rendered, the user submitting it is authenticated. Server Actions are essentially public API endpoints, and attackers can invoke them directly without going through your UI. Every Server Action should begin by verifying the session and checking authorization for the specific operation.

Handling Custom Subdomains and Tenant Resolution
Custom subdomains create a powerful user experience where each tenant feels like they have their own dedicated application. Implementing subdomain-based multi-tenancy with authentication requires careful handling of cookies, session sharing, and tenant resolution. The complexity increases significantly compared to path-based tenant identification, but the user experience improvements often justify the additional effort.
Cookie configuration becomes critical when working with subdomains. By default, cookies are scoped to the exact domain that set them. For subdomain-based multi-tenancy, you need cookies that work across all tenant subdomains while remaining secure. Set the cookie domain to your root domain with a leading dot (e.g., .yourdomain.com) to enable sharing across subdomains.
Tenant resolution from subdomains happens in middleware. Extract the hostname from the incoming request, parse out the subdomain portion, and look up the corresponding tenant in your database. Cache this lookup aggressively since it happens on every request. If the subdomain doesn't match any tenant, either redirect to your main marketing site or display a "tenant not found" error.
The authentication flow with subdomains requires special consideration for OAuth providers. When configuring social login, your callback URLs must account for the subdomain structure. Some providers allow wildcard callback URLs, while others require you to register each subdomain individually. Plan your OAuth configuration strategy based on your expected tenant volume and provider limitations.
Session tokens must include tenant context when using subdomains. After authentication, verify that the user has access to the tenant indicated by the current subdomain. A user might be authenticated but attempting to access a tenant they don't belong to. This check prevents unauthorized access even when users share browsers or accidentally navigate to wrong subdomains.
For applications that also support custom domains (not just subdomains), the complexity increases further. You'll need to maintain a mapping of custom domains to tenants and handle SSL certificate provisioning. Services like Vercel and Cloudflare offer APIs for managing custom domain SSL, or you can implement your own solution using Let's Encrypt with DNS validation.
Implementing Role-Based Access Control Within Tenants
Authentication verifies identity, but authorization determines what authenticated users can do. Within each tenant, users typically have different roles with varying permission levels. A robust role-based access control (RBAC) system ensures users can only perform actions appropriate to their role while remaining flexible enough to accommodate diverse organizational structures.
Design your permission system with both current and future needs in mind. Start by identifying the core actions users can take in your application: viewing data, creating records, editing content, managing users, configuring settings, and handling billing. Map these actions to permission flags that can be combined into roles.
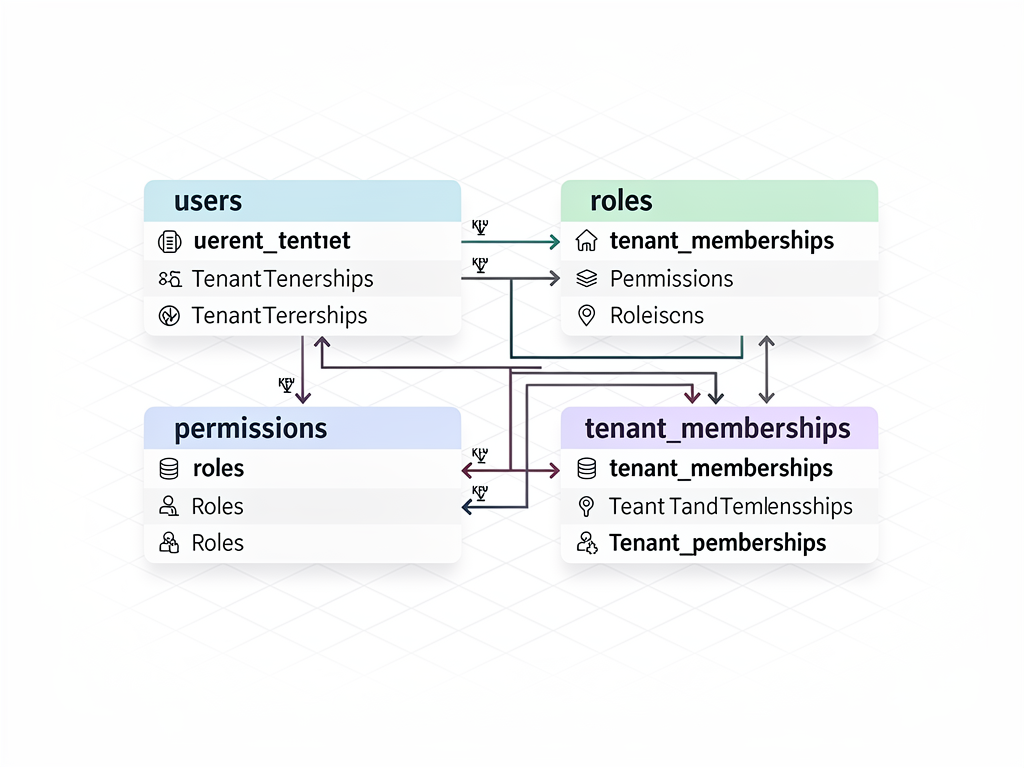
Store role definitions in your database rather than hardcoding them in your application. This approach allows tenants to customize roles for their specific needs and enables you to add new permissions without code deployments. A typical schema includes a roles table defining available roles, a permissions table listing all possible permissions, and a junction table mapping permissions to roles.
User role assignments should support multiple roles per user and potentially different roles in different contexts. A user might be an administrator for one project within a tenant but only a viewer for another. Your authorization checks must account for this contextual role assignment.
Implement authorization checks at multiple levels for defense in depth. RLS policies handle database-level restrictions based on role. Server Actions verify permissions before executing mutations. Server Components check permissions before rendering sensitive UI elements. Client Components conditionally display controls based on the user's capabilities.
Create a centralized authorization utility that other parts of your application can call. This utility should accept the current user, the action being attempted, and any relevant resource identifiers. It returns a boolean indicating whether the action is permitted or throws an error with details about why access was denied.
Managing Sessions Across Server and Client Components
Next.js App Router's hybrid rendering model creates unique challenges for session management. Sessions must be accessible in Server Components during initial render, in Client Components after hydration, and in Server Actions during form submissions. Coordinating session state across these contexts requires careful architecture and consistent patterns.
Server Components access sessions through server-side Supabase client utilities. These utilities read the session cookie from the incoming request, verify the access token, and return user information. Because Server Components render on the server, they have direct access to request headers and cookies without any special configuration.
Client Components need a different approach since they run in the browser. Create a context provider that wraps your application and provides session state to all Client Components. This provider should initialize with the session from the server render (to avoid hydration mismatches) and then subscribe to authentication state changes for real-time updates.
The session synchronization between server and client requires attention to avoid flickering or stale data. During server render, pass the initial session state to your context provider. On the client, the provider should verify this state matches the current cookie and update if necessary. Subscribe to Supabase's onAuthStateChange event to handle sign-ins, sign-outs, and token refreshes that happen in other tabs.
Token refresh is particularly important for long-lived sessions. Supabase access tokens expire after a configurable period (default one hour). Before expiration, your application should refresh the token to maintain the session. Middleware handles this automatically for server-rendered pages, but Client Components need explicit refresh logic for single-page application navigation patterns.
Consider implementing a session heartbeat for applications where users remain active for extended periods. Periodically verify the session is still valid and refresh tokens proactively rather than waiting for expiration. This approach prevents jarring authentication errors during active use.
Securing Server Actions and Route Handlers
Server Actions and Route Handlers represent your application's API surface, and they require rigorous security treatment. Unlike Server Components that render UI, these endpoints accept input and perform mutations. Attackers can invoke them directly, bypassing any client-side validation or UI restrictions. Every Server Action and Route Handler must independently verify authentication and authorization.
Begin every Server Action with authentication verification. Call your authentication utility to get the current session. If no valid session exists, throw an error or return an appropriate error response. Never proceed with the action's logic until authentication is confirmed.
After authentication, verify authorization for the specific action. Check that the user has permission to perform this operation and that they're operating within their tenant context. For actions that modify specific resources, verify the user has access to those particular resources, not just the general capability to perform the action type.
Input validation provides another security layer. Use a validation library like Zod to define schemas for your action inputs. Validate all incoming data against these schemas before processing. This prevents injection attacks, type confusion, and unexpected data from reaching your business logic.
Rate limiting protects against abuse and denial-of-service attacks. Implement rate limits based on user identity, IP address, or both. Server Actions that perform expensive operations or send external communications (like emails) should have stricter limits than simple data retrieval actions.
Audit logging creates accountability and aids incident investigation. Log all significant actions with the user who performed them, the tenant context, the action type, and relevant parameters. Store these logs securely and retain them according to your compliance requirements.
Error handling must balance security with usability. Don't expose internal error details that could help attackers understand your system. Return generic error messages to clients while logging detailed information server-side for debugging. Distinguish between authentication errors, authorization errors, validation errors, and unexpected failures in your error responses.
Implementing Magic Links and Passwordless Authentication
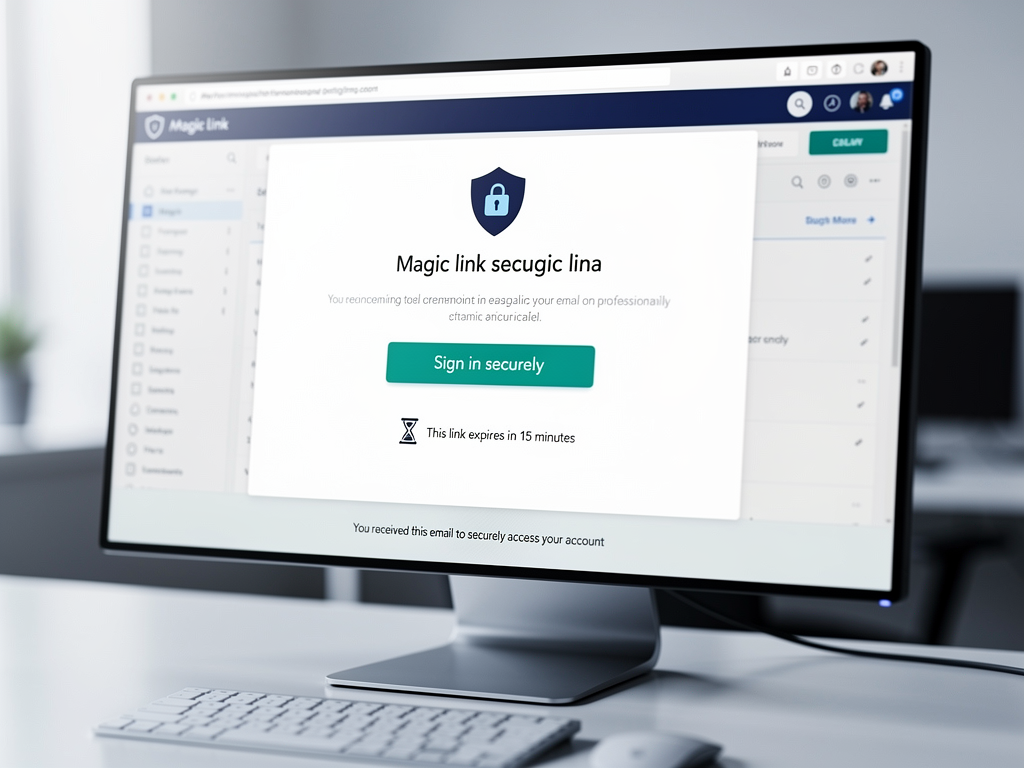
Passwordless authentication through magic links offers improved security and user experience compared to traditional passwords. Users receive a one-time link via email that authenticates them without requiring password memorization or management. Supabase Auth supports magic links natively, and integrating them into your multi-tenant application requires only modest additional configuration.
Configure magic link authentication in your Supabase project settings. Customize the email template to match your brand and include relevant tenant information if users might receive links for multiple tenants. Set appropriate expiration times balancing security (shorter is better) with usability (users need time to check email and click).
The magic link flow begins when users enter their email address on your login page. Call Supabase's signInWithOtp method with the email and a redirect URL. Supabase sends the magic link email, and when users click it, they're redirected to your specified URL with authentication tokens in the URL fragment.
Handle the callback URL carefully in multi-tenant applications. The redirect URL should include tenant context so users return to the correct subdomain or tenant path after authentication. Verify that the authenticated user has access to the tenant indicated in the callback URL before completing the sign-in flow.
Consider implementing magic link rate limiting at the application level in addition to Supabase's built-in limits. Attackers might attempt to spam magic link requests to harass users or probe for valid email addresses. Limit requests per email address and per IP address to prevent abuse.
For enterprise tenants, magic links might integrate with existing identity providers through SAML or OIDC. Supabase supports these protocols, allowing organizations to use their corporate identity systems while your application handles the multi-tenant complexity. This capability becomes essential for landing enterprise customers with strict identity requirements.
Building Team Invitation and Member Management Systems
Multi-tenant applications typically allow organization administrators to invite new team members. This invitation flow must handle users who already have accounts, users who need to create accounts, and edge cases like expired invitations or changed email addresses. A well-designed invitation system reduces friction for growing teams while maintaining security.
Design your invitation data model to track invitation status, the inviting user, the target email address, assigned role, and expiration time. Store invitations in a table with appropriate RLS policies ensuring only tenant administrators can create and view invitations for their organization.
The invitation flow begins when an administrator enters an email address and selects a role. Your application creates an invitation record and sends an email with a unique invitation link. This link should include a secure token that identifies the specific invitation without exposing sensitive information.
When recipients click the invitation link, check whether they already have an account. If they do, prompt them to sign in and then accept the invitation, which adds them to the new tenant. If they don't have an account, guide them through registration with the invitation context pre-filled, automatically adding them to the inviting tenant upon completion.
Handle invitation expiration gracefully. Display clear messages when users click expired links and provide options to request new invitations. Consider implementing reminder emails for pending invitations that approach expiration, giving recipients additional opportunities to join.
Member management extends beyond initial invitation. Administrators need interfaces to view current team members, change roles, and remove access. Implement these capabilities with appropriate authorization checks ensuring only users with member management permissions can modify team composition. When removing members, consider what happens to resources they created and whether soft-delete with data retention is preferable to hard deletion.
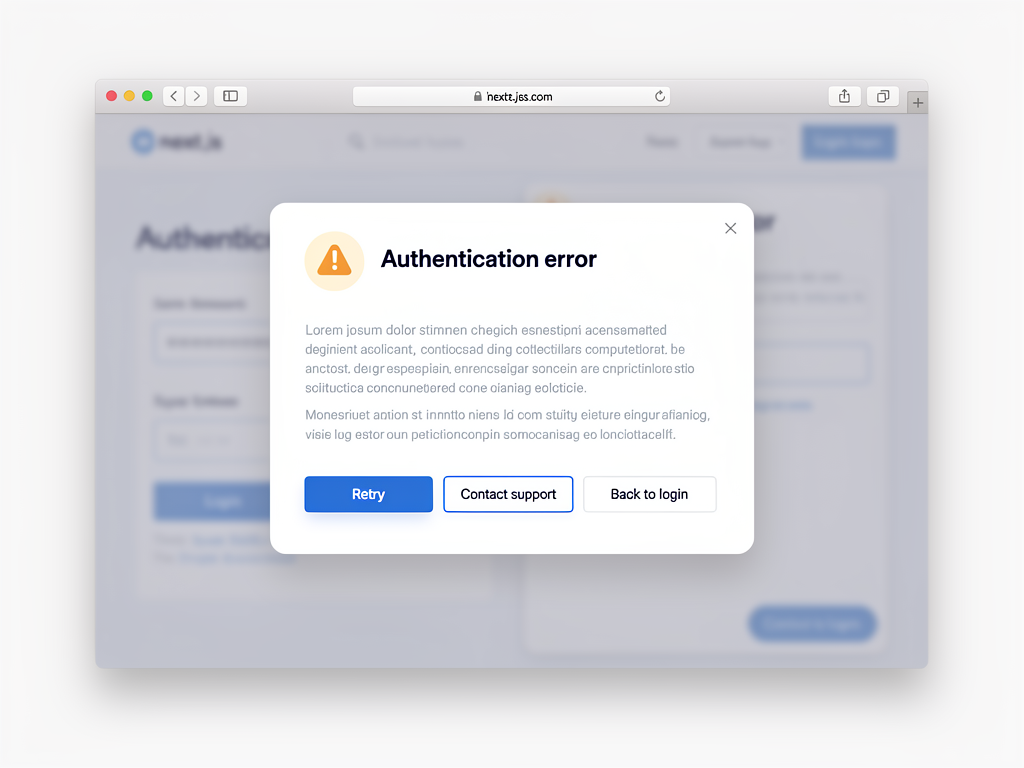
Handling Authentication Errors and Edge Cases
Production authentication systems encounter numerous edge cases that development environments rarely surface. Planning for these scenarios prevents user frustration and security vulnerabilities. Comprehensive error handling transforms potential failure points into graceful degradation and clear user guidance.
Session expiration during active use creates poor experiences if handled poorly. Detect expired sessions before users attempt actions that will fail. Display clear messages explaining what happened and provide easy paths to re-authenticate. Consider preserving form state so users don't lose work when their session expires mid-task.
Network failures during authentication require careful handling. Distinguish between temporary network issues (retry automatically) and persistent failures (inform the user). Implement exponential backoff for retries to avoid overwhelming servers during outages. Provide offline indicators so users understand why authentication isn't working.
Concurrent session management becomes relevant when users sign in from multiple devices or browsers. Decide whether your application allows unlimited concurrent sessions, limits sessions per user, or invalidates previous sessions on new sign-in. Each approach has tradeoffs between security and convenience.
Account recovery scenarios include forgotten passwords, lost access to email, and compromised accounts. Implement secure password reset flows that verify identity before allowing changes. Consider secondary verification methods for high-security applications. Document procedures for manual account recovery when automated methods fail.
Cross-tenant authentication attempts occur when authenticated users try to access tenants they don't belong to. Handle these gracefully with clear error messages rather than generic "access denied" responses. Offer options to switch to an authorized tenant or request access to the attempted tenant.
Optimizing Authentication Performance
Authentication checks happen on nearly every request, making their performance critical to overall application responsiveness. Slow authentication creates sluggish experiences that frustrate users and can even create security vulnerabilities through timeout-related edge cases. Optimize authentication paths to minimize latency while maintaining security.
Cache session verification results within request boundaries using React's cache() function. Multiple components checking authentication during a single request should share a single verification rather than repeating the work. This optimization is particularly important for pages with many protected components.
JWT verification is computationally inexpensive compared to database lookups. Structure your authentication to verify JWT signatures locally when possible, only hitting the database for operations that require fresh data. Supabase's JWT includes user metadata and claims that often suffice for authorization decisions.
Middleware should perform only essential checks to avoid adding latency to every request. Complex authorization logic belongs in your data access layer, not middleware. Use middleware for quick session validation and redirects, deferring detailed permission checks to components that actually need them.
Database connection pooling ensures authentication-related queries don't wait for connection establishment. Supabase handles connection pooling automatically, but if you're using additional databases or services in your auth flow, ensure they're similarly optimized.
Monitor authentication performance in production. Track metrics like authentication check duration, token refresh frequency, and error rates. Set alerts for anomalies that might indicate problems. Performance degradation in authentication often signals broader issues worth investigating.
Testing Multi-Tenant Authentication Systems
Comprehensive testing ensures your authentication system behaves correctly across the full range of scenarios it will encounter in production. Authentication bugs often create security vulnerabilities, making thorough testing essential rather than optional. Structure your test suite to cover unit, integration, and end-to-end scenarios.
Unit tests verify individual authentication functions in isolation. Test your session parsing, JWT verification, permission checking, and tenant resolution functions with various inputs including edge cases and malicious payloads. Mock external dependencies to keep unit tests fast and focused.
Integration tests verify authentication flows work correctly with real Supabase instances. Create test tenants and users, execute authentication flows, and verify correct behavior. Test both happy paths and error scenarios. Use Supabase's local development setup or a dedicated test project to avoid polluting production data.
End-to-end tests simulate real user interactions through browser automation. Test sign-up, sign-in, password reset, and invitation flows. Verify that authenticated users can access protected resources and unauthenticated users cannot. Test cross-tenant isolation by attempting to access resources across tenant boundaries.
Security-focused tests specifically probe for vulnerabilities. Attempt to bypass authentication through direct API calls. Try to access other tenants' data through various vectors. Test for common vulnerabilities like session fixation, CSRF, and injection attacks. Consider engaging security professionals for penetration testing before launch.
Automated test suites should run on every code change through continuous integration. Authentication is too critical to rely on manual testing alone. Configure your CI pipeline to fail deployments when authentication tests fail.

Deploying to Production with Proper Security Configuration
Production deployment requires security configurations that differ significantly from development environments. Cookies need secure flags, CORS policies must be restrictive, and secrets must be properly managed. A security-focused deployment checklist prevents common oversights that create vulnerabilities.
Configure cookies with appropriate security attributes. Set Secure flag to ensure cookies only transmit over HTTPS. Set HttpOnly to prevent JavaScript access to session cookies. Set SameSite to "Lax" or "Strict" to prevent CSRF attacks. Configure appropriate expiration times balancing security with user convenience.
HTTPS is mandatory for production authentication. Obtain SSL certificates for your domain and all tenant subdomains. Configure your hosting platform to redirect HTTP requests to HTTPS. Use HSTS headers to instruct browsers to always use secure connections.
Environment variables must be securely managed in production. Never commit secrets to version control. Use your hosting platform's secret management features or dedicated secret management services. Rotate secrets periodically and immediately if compromise is suspected.
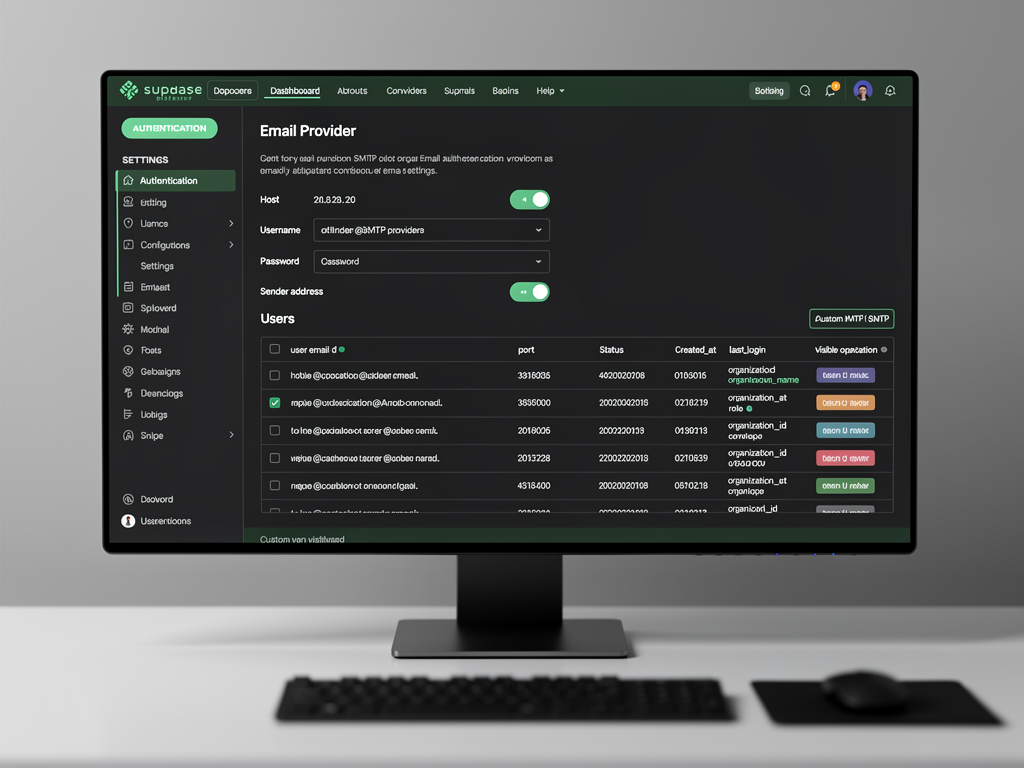
Configure Supabase project settings for production security. Enable email confirmation for new accounts. Configure appropriate password policies. Set up custom SMTP for branded transactional emails. Review and restrict API access as appropriate for your application's needs.
Implement monitoring and alerting for authentication-related events. Track failed login attempts, unusual access patterns, and error rates. Set up alerts for potential security incidents like brute force attempts or unusual geographic access patterns. Maintain audit logs for compliance and incident investigation.
Leveraging Pre-Built Solutions for Faster Development
Building multi-tenant authentication from scratch requires significant time and expertise. Pre-built solutions can accelerate development while providing battle-tested security. Evaluate whether building custom or using existing solutions best serves your project's needs and timeline.
A Next.js boilerplate with authentication pre-configured eliminates weeks of development time. Look for solutions that include multi-tenant support, role-based access control, and proper security configurations. The time saved allows focus on your application's unique value proposition rather than authentication infrastructure.
When evaluating a SaaS boilerplate or Next.js starter kit, examine the authentication implementation closely. Verify it follows security best practices like defense in depth. Check that it handles the edge cases discussed in this guide. Ensure it integrates cleanly with your planned architecture.
A multi-tenant boilerplate specifically designed for platforms like yours can provide even more value. Beyond basic authentication, these solutions often include tenant management, team invitations, and billing integration. The NextBuilder platform offers a complete foundation for building no-code SaaS platforms with authentication, custom subdomains, and SSL already configured.
Consider the long-term maintenance implications of your choice. Custom implementations require ongoing security updates and bug fixes. Pre-built solutions typically include maintenance as part of their value proposition. Factor maintenance costs into your build-versus-buy decision.
For teams building Next.js SaaS template products or SaaS starter kit offerings, understanding authentication deeply remains valuable even when using pre-built foundations. You'll need to customize, extend, and troubleshoot the authentication system throughout your product's lifecycle.
Advanced Patterns: Impersonation and Admin Access
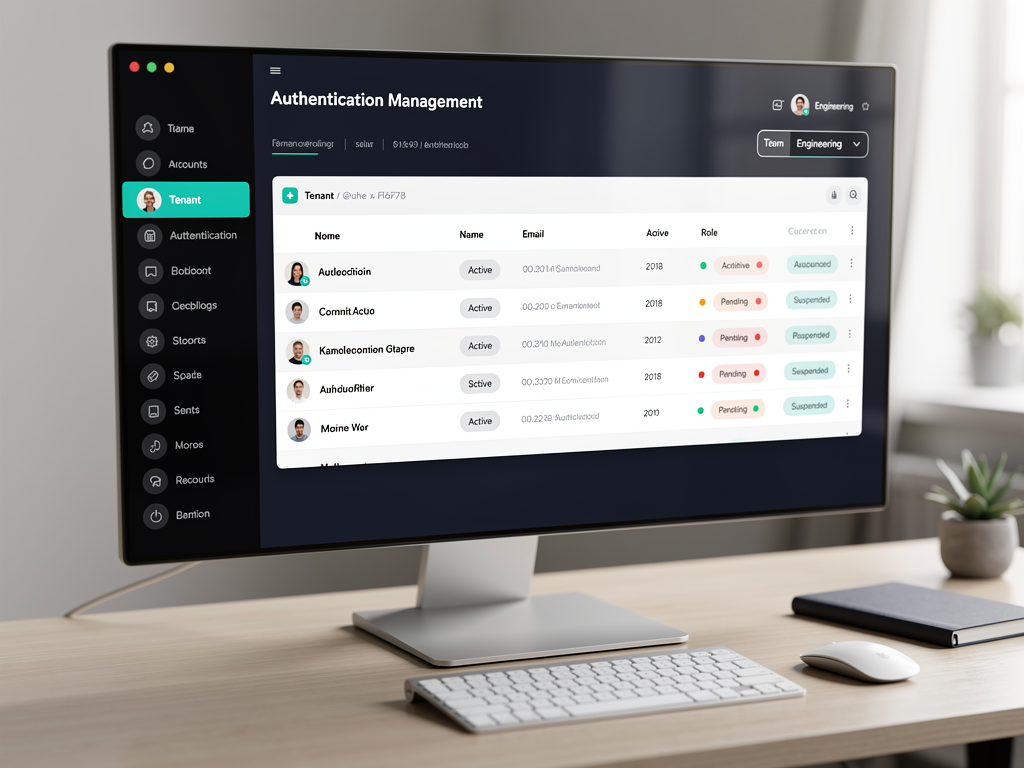
Support teams and administrators often need to view the application as specific users experience it. Impersonation capabilities enable this while maintaining security and audit trails. Implementing impersonation requires careful design to prevent abuse while providing necessary functionality.
Design impersonation as a separate session layer rather than actually signing in as the target user. The administrator maintains their own session while viewing the application through the lens of another user. This approach preserves audit trails showing who actually performed actions.
Restrict impersonation to users with explicit permissions. Not all administrators should have impersonation capability. Create a specific permission for this sensitive feature and grant it sparingly. Log all impersonation sessions with the administrator's identity, target user, and duration.
Visual indicators should clearly show when impersonation is active. Both the administrator and any observers should immediately recognize that the current view represents another user's perspective. Include easy controls to end impersonation and return to normal operation.
Consider what actions are permitted during impersonation. Read-only impersonation (viewing but not modifying) is safer than full impersonation. If modifications are necessary, require additional confirmation and create detailed audit records. Some actions like changing passwords or security settings should never be permitted during impersonation.
Cross-tenant impersonation for platform administrators requires additional safeguards. Platform admins supporting customers need to access tenant data, but this access should be temporary, logged, and ideally require tenant approval. Implement time-limited access tokens for support sessions.
Compliance Considerations for Authentication Systems
Depending on your market and customers, various compliance frameworks may govern your authentication implementation. Understanding these requirements early prevents costly retrofitting later. Common frameworks include GDPR, SOC 2, HIPAA, and industry-specific regulations.
GDPR affects applications serving European users. Authentication systems must support data subject rights including access, rectification, and deletion. Users should be able to export their authentication-related data and request complete account deletion. Consent mechanisms must be clear and granular.
SOC 2 compliance requires demonstrating security controls around authentication. Document your authentication architecture, access controls, and monitoring procedures. Implement audit logging that captures authentication events with sufficient detail for compliance reporting.
HIPAA applies to applications handling protected health information. Authentication must include appropriate access controls, audit trails, and encryption. Consider whether your multi-tenant architecture provides sufficient isolation for healthcare customers.
Password policies should align with current NIST guidelines, which have evolved significantly from older recommendations. NIST now recommends against arbitrary complexity requirements and frequent rotation, instead emphasizing length and checking against known compromised passwords. Implement these modern recommendations rather than outdated practices.
Data residency requirements may affect where authentication data is stored. Some customers require data to remain within specific geographic regions. Supabase offers regional deployment options, and your architecture should accommodate customer-specific residency requirements.

Future-Proofing Your Authentication Architecture
Authentication standards and best practices evolve continuously. Building flexibility into your architecture allows adaptation without major rewrites. Consider emerging technologies and patterns that may become relevant to your application.
Passkeys represent the future of passwordless authentication. Built on WebAuthn standards, passkeys provide phishing-resistant authentication using device biometrics or security keys. Supabase is adding passkey support, and designing your authentication flow to accommodate this technology positions you well for adoption.
Decentralized identity systems may eventually change how authentication works fundamentally. While not yet mainstream, keeping awareness of developments in this space helps you evaluate when and whether to adopt these approaches.
AI-powered security features are emerging for fraud detection and anomaly identification. Authentication systems that capture appropriate signals can leverage these capabilities as they mature. Consider what data you're collecting and whether it would support future AI-enhanced security.
Multi-factor authentication expectations are increasing. What was once optional is becoming expected or required. Ensure your architecture can support various MFA methods including authenticator apps, SMS (despite its weaknesses), and hardware keys.
Federation and single sign-on requirements grow as your customer base matures. Enterprise customers expect integration with their identity providers. Building federation support into your architecture from the start is easier than retrofitting it later.

Conclusion
Building secure multi-tenant authentication with Next.js and Supabase requires attention to numerous details across architecture, implementation, and operations. The combination of Supabase's Row Level Security with Next.js App Router's flexible rendering model provides a powerful foundation for applications serving multiple organizations with strong data isolation.
Success depends on implementing defense in depth, with authentication and authorization checks at every layer from middleware through database policies. Session management across server and client contexts requires careful coordination. Custom subdomain support adds complexity but delivers superior user experiences for multi-tenant platforms.
Whether you build authentication from scratch or leverage a SaaS template solution, understanding these principles ensures you can make informed decisions and troubleshoot issues effectively. The investment in proper authentication architecture pays dividends throughout your application's lifecycle through improved security, easier maintenance, and happier users.
For teams building no-code platforms, app builders, or other multi-tenant SaaS products, the authentication patterns described here provide the foundation for secure, scalable growth. Combined with proper testing, monitoring, and compliance considerations, you'll be well-positioned to serve customers ranging from small teams to enterprise organizations.
Frequently Asked Questions
How Do I Handle Authentication Across Multiple Subdomains in Next.js?
Handling authentication across multiple subdomains requires configuring cookies to be shared across your domain hierarchy. Set the cookie domain to your root domain with a leading dot (e.g., .yourdomain.com) so cookies set on one subdomain are readable on others. In your Supabase client configuration, specify this domain when setting authentication cookies. Additionally, configure your middleware to extract the subdomain from incoming requests and resolve it to the appropriate tenant. Verify that authenticated users have access to the specific tenant indicated by the subdomain they're accessing. For custom domains beyond subdomains, you'll need additional infrastructure for SSL certificate provisioning and domain-to-tenant mapping, which platforms like NextBuilder's multi-tenant architecture handle automatically.
What Is the Best Way to Implement Row Level Security for Multi-Tenant Data?
The most effective RLS implementation for multi-tenant applications uses a consistent tenant identifier column across all tables containing tenant-specific data. Create a helper function in PostgreSQL that extracts the current user's tenant from their JWT claims using auth.jwt(). Reference this function in your RLS policies rather than duplicating the extraction logic. Your SELECT policies should filter rows where the tenant_id matches the current user's tenant. INSERT policies should verify users can only create records for their own tenant, potentially using a trigger to automatically set the tenant_id. UPDATE and DELETE policies combine tenant filtering with any additional role-based restrictions. Test your policies thoroughly by attempting cross-tenant access through various query patterns including joins, subqueries, and function calls. Automated tests verifying tenant isolation should run in your CI pipeline.
How Should I Structure Authentication Checks in Next.js Server Components?
Server Components should verify authentication at the component level rather than relying solely on middleware or layout checks. Create a centralized authentication utility that reads the session from cookies, verifies the token, and returns user information or throws an error. Wrap this utility in React's cache() function to prevent redundant verification during a single request when multiple components check authentication. Call this utility at the beginning of any Server Component that renders protected content. Importantly, do not rely on layout-level authentication checks alone because layouts don't re-render on client-side navigation, meaning the authentication check wouldn't run when users navigate between pages. Each page component should independently verify authentication. For Server Actions, authentication verification is even more critical since these are essentially public API endpoints that attackers can invoke directly.
What Security Measures Should I Implement Beyond Basic Authentication?
Defense in depth requires multiple security layers beyond basic authentication. Implement rate limiting on authentication endpoints to prevent brute force attacks, with limits based on both IP address and email address. Add CAPTCHA or similar challenges after repeated failed attempts. Configure secure cookie attributes including Secure, HttpOnly, and appropriate SameSite settings. Implement CSRF protection for any state-changing operations. Use Content Security Policy headers to prevent XSS attacks. Enable audit logging for all authentication events including successful logins, failed attempts, password changes, and session terminations. Monitor for anomalous patterns like impossible travel (logins from distant locations in short timeframes) or unusual access times. Consider implementing step-up authentication requiring additional verification for sensitive operations like changing security settings or accessing financial data. Regular security assessments and penetration testing help identify vulnerabilities before attackers do.
How Do I Handle Token Refresh in a Next.js Application with Supabase?
Token refresh in Next.js requires handling both server-side and client-side scenarios. For server-rendered pages, implement token refresh in middleware that runs before every request. Check if the access token is expired or approaching expiration, and if so, use the refresh token to obtain new tokens and update the cookies in the response. For client-side navigation in single-page application patterns, subscribe to Supabase's onAuthStateChange event to detect when tokens are refreshed. Implement proactive refresh logic that refreshes tokens before they expire rather than waiting for authentication failures. Consider the user experience during refresh, ensuring that in-progress operations aren't interrupted. For long-lived sessions, implement a heartbeat mechanism that periodically verifies session validity and refreshes tokens as needed. Handle refresh failures gracefully by prompting users to re-authenticate rather than showing cryptic error messages.
Can I Use Supabase Auth with External Identity Providers for Enterprise Customers?
Supabase Auth supports integration with external identity providers through SAML and OIDC protocols, making it suitable for enterprise customers with existing identity infrastructure. Configure SAML connections in your Supabase project settings, providing the identity provider's metadata and configuring attribute mappings. For OIDC providers, configure the discovery URL and client credentials. When enterprise users authenticate, they're redirected to their corporate identity provider, and upon successful authentication, Supabase creates or updates a user record linked to that provider. Your multi-tenant application should handle the post-authentication flow to associate users with the correct tenant based on their identity provider or email domain. Consider implementing just-in-time provisioning that automatically creates tenant memberships when users from configured domains authenticate. Enterprise SSO often comes with additional requirements like mandatory MFA, session timeout policies, and detailed audit logging that your application should accommodate.
Ready to Build Your Multi-Tenant Platform?
Stop spending months building authentication infrastructure from scratch. NextBuilder provides a complete Next.js foundation for multi-tenant SaaS platforms with authentication, custom subdomains, SSL, and team management already configured. Launch your no-code platform in days instead of months, letting your clients create unlimited apps while you focus on what makes your platform unique. Get started with NextBuilder today and see how quickly you can go from idea to production-ready platform.
Subscribe to our newsletter
Subscribe to our newsletter and stay up-to-date with the latest news and updates.